I bought a Rivett lathe earlier this year. It was on eBay, and rather unexpectedly cheap, and I really didn't expect to win the auction.
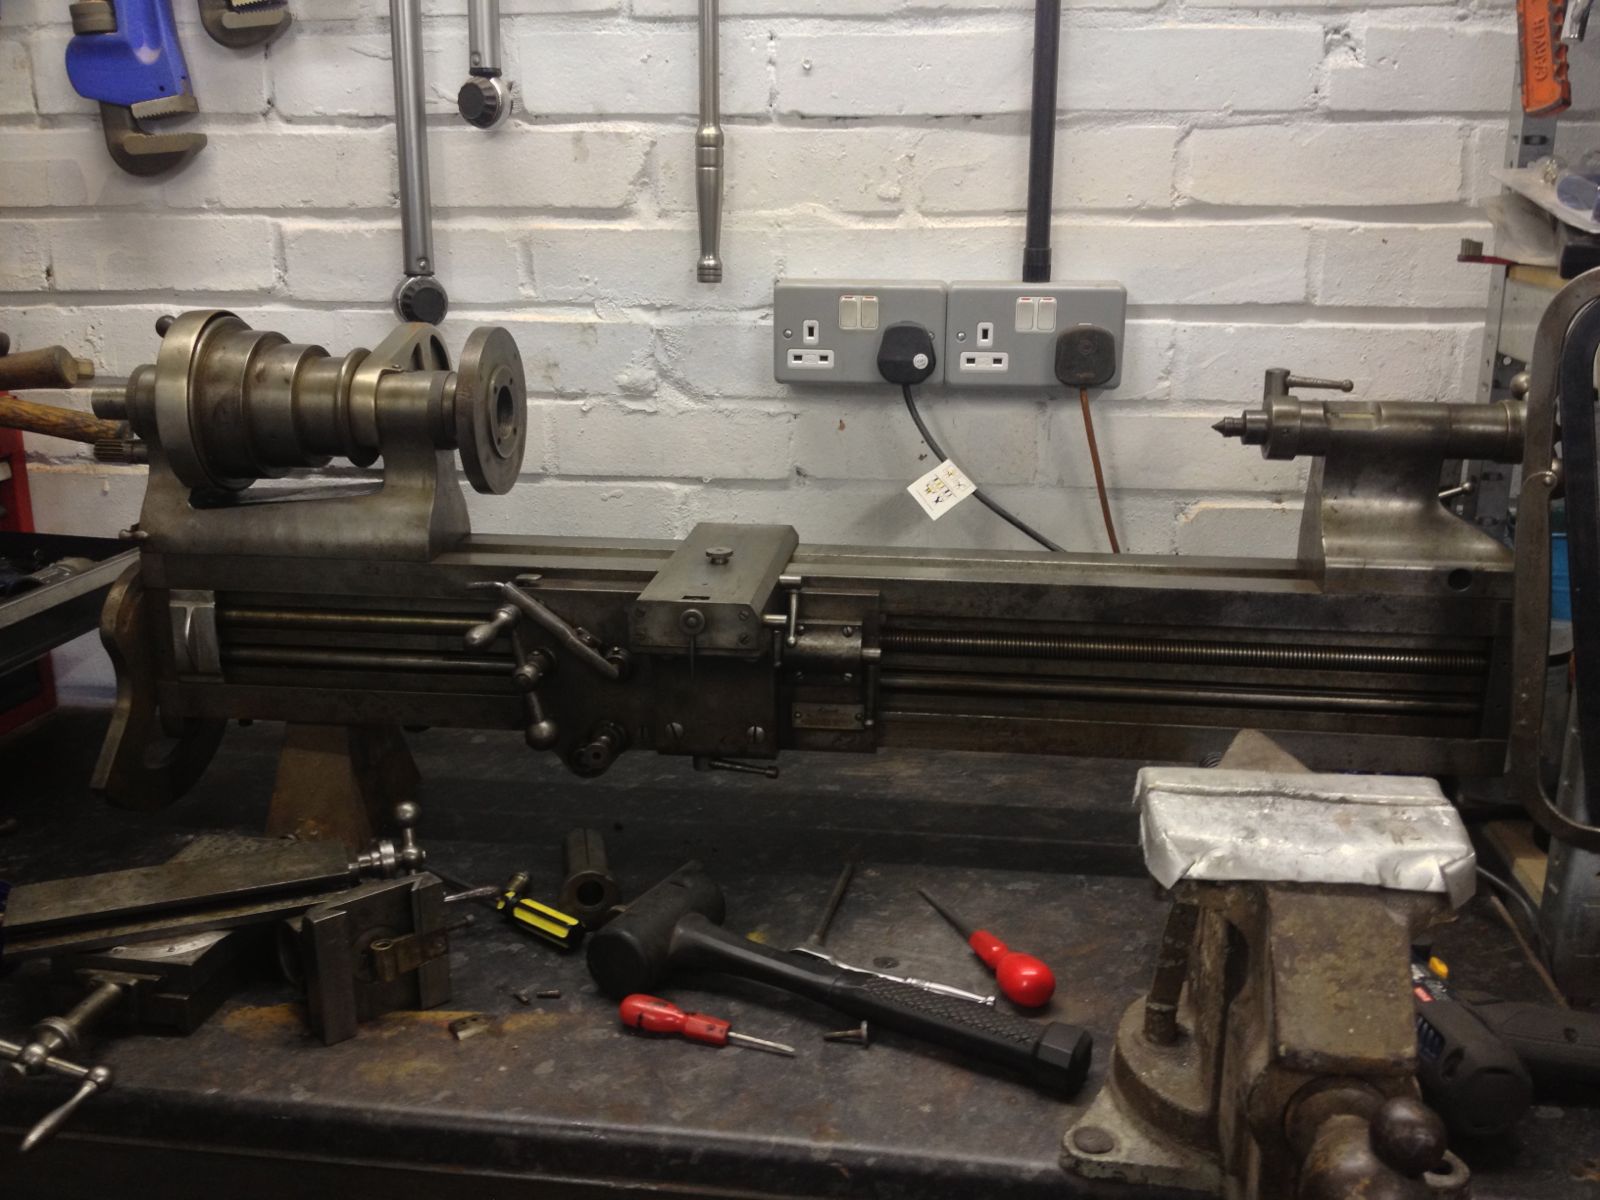
The Rivett 608 is an interesting lathe, and was quite frighteningly expensive in its day. The lathe, on an oak cabinet stand, cost $2000 in 1936. Which might explain how the company was profitable despite them starting production in the 1920s and only getting to serial number 363 by 1936 when they made mine.
Much more information about the lathe can be found at the excellent lathes.co.uk site. As can be seen there, the original oak stand was quite handsome. But my lathe came without a stand of any sort.
On a whim, I decided to make one. The first stage was a CAD model. I use Autodesk Inventor, as I was, for a while, a full-time mechanical designer and that was the package we used. I rather like it.

I then made drawings of the parts, and what a lot there were. There are something like 80 bits of wood in the whole cabinet, not including the strips that make up the top surface.
So, I made up a set of drawings, and wrote a macro in the Inventor VBA to give me the boundary dimensions of all the parts, and then produced a cutting list that I passed on to a timber merchant close to my parents' house where I intended to do the work over the course of the Christmas break.
A big thumbs-up to http://huddersfield.timberspecialists.com for their helpfulness and having the wood in stock. When I arrived I was a bit surprised to find the wood still in lengths longer than the car, but the chap there cut it into shorter sections with remarkably good grace considering that it was 1630 on the last working day before Christmas.
This is the wood. A fair amount of American White Oak (quercus alba) stacked on top of the left-over parts of my dad's locally-grown english oak stock (quercus robur), all that is left from hundreds of cubic feet we used to restore Slaithwaite Hall, which might possibly become another blog entry.

This is on the rather downsized woodworking room which was previously the metalworking room. Things are a bit tight in there with 2 table saws, a jointer, a radial arm saw, a thicknesser and a router table, not to mention really quite a lot of wood. Unfortunately it no longer contains a workbench or vice, which was a bit of a nuisance.
It took me two full days of planing, sawing and thicknessing to convert the raw timber into smooth square pieces suitable for cabinet making.

A continuing theme throughout this project was my mum coming in to get some food out of the freezer only to find that I had colonised the only flat, empty surface in the building.
I decided to start with the back panel, as that was least critical, while I got my woodworking skills back up to speed after several years off.
The back panel is two stringers, two sides and 4 panels separated by uprights. The panels were made from some wood my dad bought in an auction many years ago, the stock of a bankrupt kitchen manufacturer. This included lots of profiled door-sides, and dozens of door panels, which looked like they would work well for my panels. I think the original plan was to use them for panelling a room in the house, but it hasn't happened yet.

There was a brief pause in proceedings at this point, I didn't do any woodwork on Christmas day, though it was hard to resist the urge.
Next job was the doors, a similar construction to the back, and the front frame, and the sides. I have combined all these in one, as it seems I didn't take many pictures that day. The picture shows the doors glued up in the sash cramps, and the front frame and sides on top (space was tight) with the back panel in place to keep things straight and square.

Next to be fitted was the cabinet floor, a pretty easy job, as I decided to just use 18mm ply.

Then I planed the doors to fit. The floor protrudes through the front and rests on the lower stretcher, so I could't fit the doors until the floor was in. The ugly edge of the floor is concealed by something that can only be described as a skirting board when the cabinet is complete.


The went so well that I decided to dovetail the top frame too. This top frame is possibly all that differentiates this cabinet from normal furniture, it has to carry quite a bit of weight on top.


The original Rivett cabinet top was apparently 5 plies of quite thick oak. Making that would have required a press that I simply do not have, so I decided to cheat and to simply glue some of the kitchen cupboard sides to another piece of 18mm ply, then add an edging strip.
I was planning to weight it all down with some bags of cement that I had spotted in the corner, and so I covered the glued-on strips with newspaper, and plonked on the cement, only to find that they had all gone off, and were hard, not the sort of compliant soft weight I was hoping for. I did find really quite a lot of chain, though, and that seemed to make a decent floppy weight.
Unfortunately the next morning it seemed clear that overnight temperatures had not been high enough for the glue to set. I managed to trim the edges without losing too many bits, and fitted the edge strips, then strapped the whole thing up with luggage straps and left it in the house, on the underfloor-heated stone floor. The glue was a lot better behaved that time.

You can see that one half is sanded and nice, and one half isn't. The drive belt in the belt sander failed. There is still newspaper stuck to the top too.
I spent a whole day making the drawer slides, as I hadn't decided when I did the CAD model if i was going to use ball-bearing slides or the traditional wooden style, and so hadn't modelled those bits. In the end I went for tradition.
All that was left then was the back board, some beadings and the skirting boards, and the construction was complete:


The stand was then dismantled and transported to my own house as a flatpack.
I decided to fume the oak to darken it slightly and bring out the grain. (http://en.wikipedia.org/wiki/Ammonia_fuming Partly because it is a process I have known about for years, but I have never tried. I was surprised how hard it is to find Ammonia nowadays. My mother and grandmother used it all the time, and my sister was known as "the ammonia Queen" when she worked at the local shop and liked to use it to mop the floor. It's a smell that reminds me of cleaning and hygiene, rather than, for example, stale urine and squalor. This was to prove useful later.
I found an eBay ad for 35% (strong) ammonia and bought some from there, having drawn a blank at the supermarkets.
Normally you would fume oak in a separate room, in a specially made airtight box. But I didn't have the space, so I did it in my front room, though it did block the view of the TV.
I built a frame of bamboo poles and gaffer tape, then wrapped that in lots of cheap cling-film.

It took 4 hours to get the oak to the shade I wanted. I then applied a pale shellac french-polish. I largely used a brush, only using the traditional rubber on the cabinet top. I am rather sold on shellac, it is very thin and goes on without sags and runs. I feel a bit guilty about the insects though. I am not sure if anyone cares to make "bug-friendly" shellac.
The original Rivett cabinet contained their "Speed Box Drive" but I don't have one of those. I am using a 750rpm motor and a variable-frequency drive, which ought to work at least as well.
The motor hangs from brass inserts just as the Speed Box did:

This photo also shows the C-shaped groove that allows the belt to pass. It is C-shaped to allow an endless belt to be fitted.
This is the motor in-situ. Fitting it was a bit of a struggle, as it is quite heavy, and the pulley is as heavy again. It also had to go in and out really quite a lot of times. I got quite good at sitting in a cupboard with a knee supporting the motor while I tightened nuts. But I never learned to enjoy it.

Getting the lathe out of the garage (which keeps flooding, and is no place for a bare cast-iron lathe) into the house was a challenge. I ended up making a halter out of a luggage strap wrapped around my shoulders to carry the bed across the garden. The lighter-than-air feeling when I unstrapped myself from the 80kg lump of iron lasted longer than the walk with it, which surprised me. If earth gravity ever accidentally doubles, I now know I will be able to walk short distances.
And, finally, with everything in place, the finished article. Purists will note that these are the wrong feet for an underdrive arrangement. I can move the motor on the studs to adjust belt tension though.

Of course, this was the point when I realised that the bed is quite worn in the dovetails, and needs a bit of a refurbishment....